3D animation may seem to be the realm of big budget movies, and certainly major companies like Industrial Light and Magic use big budget software. Thankfully, the if you want to try 3d animation as a hobby, you can do an impressive amount of work using free software such as Blender. Alot of the principles are transferable across animation software in general.
This is the first in a series of tutorials I've written for Blender - which will introduce you to the basics of opening files, moving around the screen and navigating your view. But for those of you who want to skip:
**** **** **** **** ****
**** **** **** **** ****
1 -- A note about the File menu
When opening files… APPEND adds another blender file
OPEN adds files not from blender
If you save over a file (eg animation.blend) the ‘old’ file automatically becomes a backup incase you do anything wrong (eg animation.blend1)
2 -- Changing the screen view

To change your screen view, move your mouse over a boundary until it becomes a double-sided arrow.
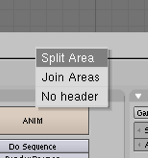
 Right-click and a box will appear. Select “split area” and a dividing line will be created that you can move to where you want. When you are satisfied it’s in the right place press the left mouse button.
To join two areas simply right-click the “join area” bit of the box which appears when you right click over a boundary (see above).
You can change what is in each window so you don’t get four camera views or four top views…
There are two ways you can do this:
Move your cursor over the “view” button at the bottom of a window and change it to eg camera, top, front or side. (See diagram below).
Or you can move your cursor across the window and click the view buttons (remember, NUM LOCK MUST BE ON):
When you have selected the camera, the following will appear on the screen:
To move around the 3D space, you also use the numlock number keys:
You can also navigate the screen using a combination of keyboard and mouse-buttons
- Shift + scrolling the mouse wheel also means you pan up and down the screen
- Alt + scrolling the mouse wheel also means you pan left and right
- Scrolling the mouse wheel zooms in and out
- The left mouse button moves the 3D cursor (which controls where the next created object will be placed), selects objects and drags windows
- The right mouse button selects objects and vertices in edit mode


No comments:
Post a Comment